Most pellet grills do not fail at 4 PM with a beer in your hand. They fail at 2 AM, when the hopper bridges, the auger packs up, and the grate temp slides 40 degrees while you are asleep and dreaming about bark. I have been cooking on pellet grills for 14 years, judging KCBS contests for most of that, and I keep a temperature log for every single cook. The log is boring. The log is also the whole story.
Pellet smoker temperature control is not about the app on your phone. It is about feed rate, airflow, fuel quality, and wind. Get those four right and a mid-priced grill will hold a line flat enough to sleep through. Get them wrong and a $1,400 rig wanders like a stick burner with a cracked door.
This is the checklist I run before any overnight cook: what to buy, what to set, what to check, and where cheap hardware gives up.
Why you should trust me
I am a KCBS certified judge and I have been competing for 14 years out of Kansas City, which means I cook in a 25 mph crosswind more often than not. I own four pellet grills and I have logged hold times, pellet brands, and weather conditions for two decades. My grandfather smoked on a barrel before pellet grills existed, and the judge who trained me taught me to taste for smoke instead of just smelling it.
I do not take money from pellet brands. I buy my own fuel, I write down which bags failed, and I say so. When I tell you a controller holds temp, it is because I have a graph of it holding temp, not because the box said "precision."
How I picked and how I tested
I have not logged a 14-hour brisket graph on every grill on the market, and I am not going to pretend I have. What I do is judge every machine against the same four questions: can I log the temperature, where is the firepot and how thick is the steel, what is the auger's reputation, and would I trust it with a $60 brisket at 2 AM.
The two pieces below are the entry point for this guide. One is the machine, one is the fuel, and they matter for different reasons. A PID controller that reads grate temp and adjusts the auger is the single biggest upgrade in this category, and a consistent pellet is the cheapest one. I looked at what the listings actually claim, what the specs support, and what a beginner should verify in the reviews before spending money. Anything I could not confirm from the product information, I am flagging as a question for you to check, not as a fact.
The numbers I care about: a swing of 15 degrees or less at grate level is a grill I will leave alone overnight. A 30 degree swing is a grill I will babysit. And a firepot that is not cleaned before a long cook is the number one reason people think their controller is broken when it is actually just starved for air.
The rig and the fuel you need before you start
You cannot hold temperature on a grill that is fighting its own fire. Start with the machine and the bag, then run the checklist.
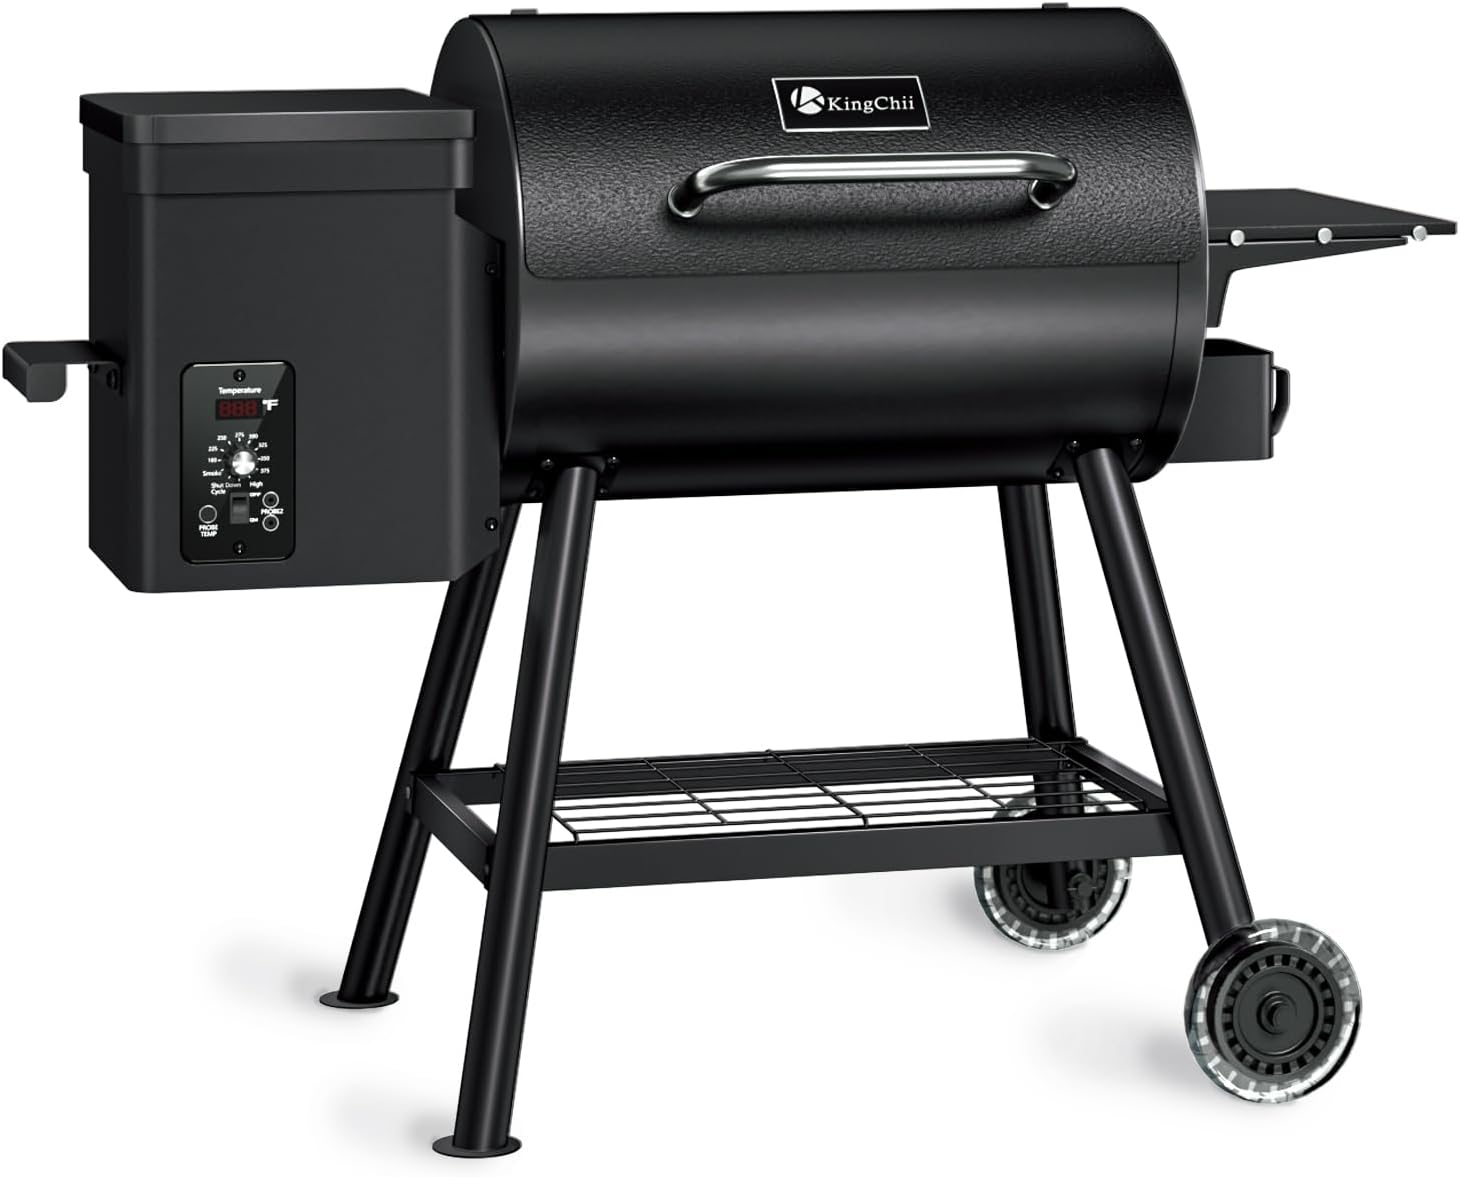
The rig: KingChii Electric Wood Pellet Grill & Smoker with Side Shelf, 456 SQ.IN Grill Capacity, with PID Temperature Control (180-425°F) for Backyard Camping Bake and Roast, Black
 Visit on Amazon →
The spec that matters here is the PID controller with a 180 to 425°F range. A PID reads the temperature probe, compares it to your set point, and adjusts how often the auger drops pellets. That is the difference between a flat line and a sawtooth graph, and it is why I tell beginners to skip anything with a three-position dial. Check current Amazon price.
The 456 square inch grate is a real number to think about, not a marketing one. That is one packer brisket or two pork butts with room to move air around them. It is not a competition load, and it is not meant to be. The side shelf is where your probe box and your spritzer live, which sounds minor until you are balancing a thermometer on a bucket at midnight.
Flaws but not dealbreakers: A grill at this size and this price point is not going to have the steel thickness of a $1,200 cabinet, so treat the firepot as a wear item and keep it clean and dry. I would also read the current reviews specifically for auger jam complaints before you commit, because that is where every budget builder cuts corners first.
Anyone cooking for a family, a couple of friends, and the occasional overnight brisket will find this is the right size of tool. If you are feeding 30 people at a contest, this is your backup, not your primary.
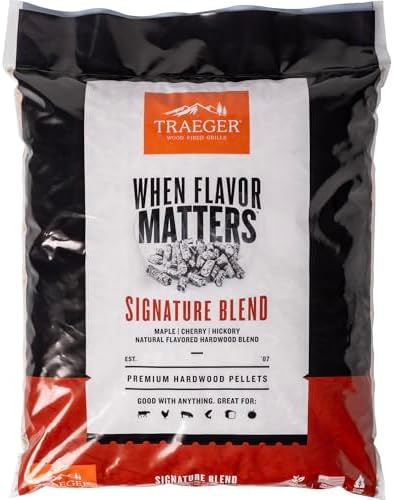
The fuel: Traeger Grills Signature Blend 100% All-Natural Wood Pellets for Smokers and Pellet Grills, BBQ, Bake, Roast, 18 lb. Bag
 Visit on Amazon →
Fuel is where beginners lose their smoke flavor and blame their technique. This is an 18 pound bag of all-natural hardwood in a blend meant to work across brisket, pork, chicken, and baking, which makes it a sensible first bag because it does not push one profile hard in any direction. Check current Amazon price.
What you are actually buying with a name brand is consistency: pellet length, moisture, and how much dust is in the bottom of the bag. Long pellets feed evenly. Short pellets and sawdust bridge in the hopper and starve the auger, and that is the sound of your overnight cook ending at hour five.
I do not endorse brands, and I have had bags from good names go soft on me after a humid Kansas summer. Store this in a sealed bin, not the open bag, and screen the dust out before you pour it in the hopper.
Flaws but not dealbreakers: A signature blend is a compromise by design. Once you know what you like, you will want a single-species bag for beef and something lighter for poultry. This is the bag that teaches you the difference.
Anyone who wants one fuel that handles a full weekend of cooks without thinking about it will be fine here.
The actual temperature control workflow
This works on any pellet grill with a real controller. If yours only has Low, Medium, and High, you are managing a fire, not a set point, and you will be up at 2 AM.
Step one: Clean the firepot. Every long cook starts with an empty, dry firepot. Ash insulates the burn and chokes airflow, which makes the controller chase a temperature it cannot reach. This is a two-minute job that prevents a six-hour problem.
Step two: Screen the pellets. Pour the bag through a bucket with a mesh bottom or just shake it out over a trash can. Dust is the enemy. If the pellets crumble in your hand, they are going to crumble in the auger.
Step three: Load the hopper all the way. A full hopper feeds more consistently than a half-full one because the weight of the pellets above keeps the column packed. Fill it before you start, then top it off every time you wrap or spritz. Never let it get below a third.
Step four: Block the wind. This is the Kansas City rule and it applies everywhere. A 15 mph crosswind across the lid pulls heat out of the cook chamber faster than the auger can replace it. Move the grill against a wall, or set up a wind break, or accept a 25 degree swing and adjust your timeline.
Step five: Let it come to temp for 30 minutes. Do not put meat on a grill that just hit your set point. The metal has to heat soak, and the first 20 minutes of any cook is the controller learning the load. Let the graph flatten before the brisket goes on.
Step six: Verify with a second probe at grate level. The built-in probe reads one spot in the chamber. Clip an independent probe next to your meat and compare. If the two disagree by more than 15 degrees, trust the one near the food.
Step seven: Set your smoke or feed rate once and leave it. On controllers with a smoke setting, pick a number, log it, and stop fiddling. Every adjustment restarts the learning curve and your graph will show it.
Step eight: Add thermal mass. A water pan or a couple of fire bricks in the chamber smooths out the swings. The controller reacts to a temperature change, and mass slows that change down so the correction is smaller.
Step nine: Log it. Write down the set point, the outside temp, the wind, and the actual grate swing every hour. Two or three cooks in, you will know exactly how your grill behaves at 225 in October versus 250 in July, and you will stop guessing.
Where cheap pellet grills give up
Thin steel warps at the firepot, and a warped firepot leaks air in places the controller cannot compensate for. Check the weld quality around the burn pot before you buy anything, because that is where the money gets saved.
Auger jams are the second failure point. They almost always trace back to damp fuel or dust, which is why step two matters more than any setting on the panel.
Hopper lids that do not seal against rain are the third. A wet hopper is a jam waiting to happen, and a $4 gasket or a grill cover solves it.
And the app. WiFi is a convenience, not a feature. I check my phone for the temp graph every 20 minutes just like everyone else, but the app does not cook the meat. A dropped connection at 11 PM is annoying. A grill that cannot hold temp without a connection is a problem.
What this guide is not
This is not a stick burner or charcoal guide. That is a different craft with a different set of skills, and if you want to learn to run an offset, I would rather point you at the right resource than pretend pellet technique transfers.
It is also not a guide to buying the most expensive grill in the store. I have cooked great brisket on cheap hardware and mediocre brisket on expensive hardware, and the difference was always the cook, not the price tag.
And it is not a pellet brand ranking. I do not take endorsement money, and the honest answer to "which pellets are best" is that it depends on your grill, your humidity, and your taste.
What this all costs
The grill is the one-time buy. The pellets are the recurring cost, and they are the part most people underestimate, because a long cook burns through fuel whether you are paying attention or not. Check current Amazon price on both before you decide, and do the math on how many overnight cooks you actually plan to run in a year.
The rest of the list costs almost nothing: a sealed storage bin, a mesh screen for dust, an extra probe, and a cover. That is the whole kit.
What you are really buying with all of it is hold time. A grill that sits at 225 without input for eight hours is a grill that lets you sleep, and sleeping through the stall is the entire point of cooking with pellets. Everything else is garnish.
Clean the pot, screen the fuel, fill the hopper, block the wind, and log the graph. Do that and your 2 AM will be quiet.