Pellet grill temperature control is the whole game when a cook runs past midnight. Anybody can hold 225 for an hour on a Saturday afternoon. The real test is hour six, when the wind picks up, the hopper is half empty, and you are supposed to be asleep.
I have been cooking on pellets for 14 years, judging KCBS contests for most of that, and I keep a temperature graph for every single cook. That logbook is 20 years old now, and it has taught me one thing: the brisket does not care what the box promised. It cares what the grate did at 2 AM.
This is the workflow I run for an overnight brisket on a pellet grill. It works on any PID-controlled cooker, and I will show you the two I would set up for it.
Why you should trust me
I am Joe. I cook out of Kansas City, I have been competing for 14 years, and I am a KCBS certified judge. I own four pellet grills, which is three more than any sane person needs, and I keep a logbook of hold times, pellet brands, and what the weather did to the smoke on every cook.
Nobody hands me free grills, and I do not write about a cooker until I have run a full packer on it with a logged temperature graph. If I cannot see the graph, I do not have a verdict. That rule has saved me from recommending more than one pretty grill with a thin firepot.
How I judge a grill for an overnight cook
I run every cooker through four questions before it earns a spot in this workflow.
Can I log the temperature? No log, no verdict. A controller that says 225 while the grate sits at 205 is not a smoker, it is a suggestion. You want a PID controller and a port or a probe you can park at grate level.
Where is the firepot, and how thick is the steel around it? Thin steel warps and lies. When the firepot warps, the airflow changes, and suddenly your hold time falls apart at hour four.
What is the auger's reputation? Auger jam stories spread fast in this community, and they always start the same way: cheap pellets, humid garage, six hours into a brisket.
Would I trust it with a brisket at 2 AM? That is the only test that matters. Everything else is garnish.
Both grills below pass those four questions for an overnight cook. They are the two I would set up tonight if a packer showed up on my counter.
The two grills I would set up for this cook
One of these is for people who cook for a crowd. The other is for people who cook on a small patio and want the shelves out of the way when the cook is done.
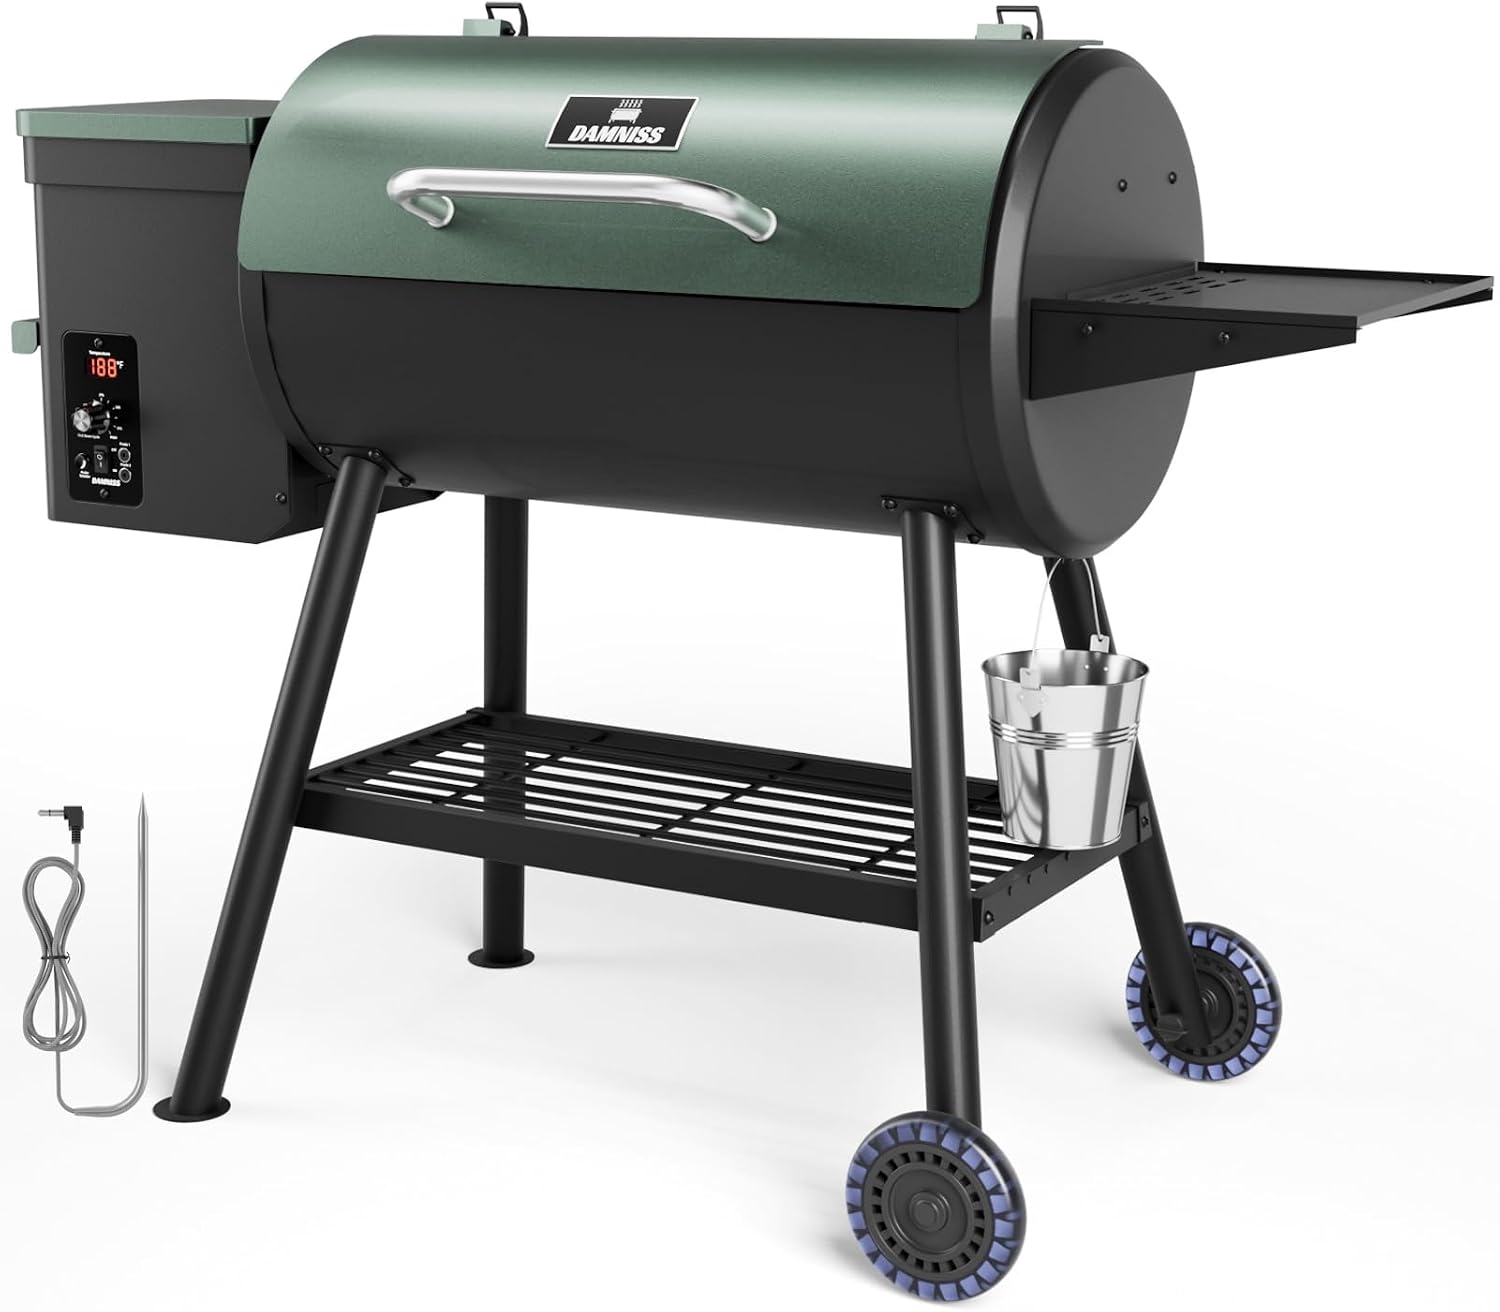
Our pick: DAMNISS Pellet Grill & Smoker, Large Size 565 Sq In | PID Temperature Control 8-In-1 BBQ Versatility, 450°f Max,Meat Probe Grill, Smoke, BBQ Bake, Roast, Braise
 Visit on Amazon →
This is the one I would pick for a big overnight cook, and the reason is grate area. With 565 square inches you can lay a full packer on the main grate and still have room for a pork butt or a rack of ribs off to the side, which matters more than people think. A crowded chamber blocks airflow, and blocked airflow is what turns a clean cook into a fight.
The PID controller is the part that earns its keep overnight. A PID reads the actual chamber temp and adjusts the auger feed instead of running on a timer, so it corrects for a cold front coming through at 3 AM instead of just feeding pellets at a fixed rate. It tops out at 450 degrees, which covers the whole 8-in-1 range from low smoke up to a hot sear, and the included meat probe lets you track the flat without lifting the lid. The lid stays closed on an overnight cook. That is not a preference, it is a rule.
Flaws but not dealbreakers: A chamber this size takes longer to come up to temp on a cold morning, so start your burn-off earlier than you think you need to. Give it the full warm-up and let the steel settle before the meat goes on.
Anyone feeding a crowd, or anyone who wants a second cook running alongside the brisket, should start here.
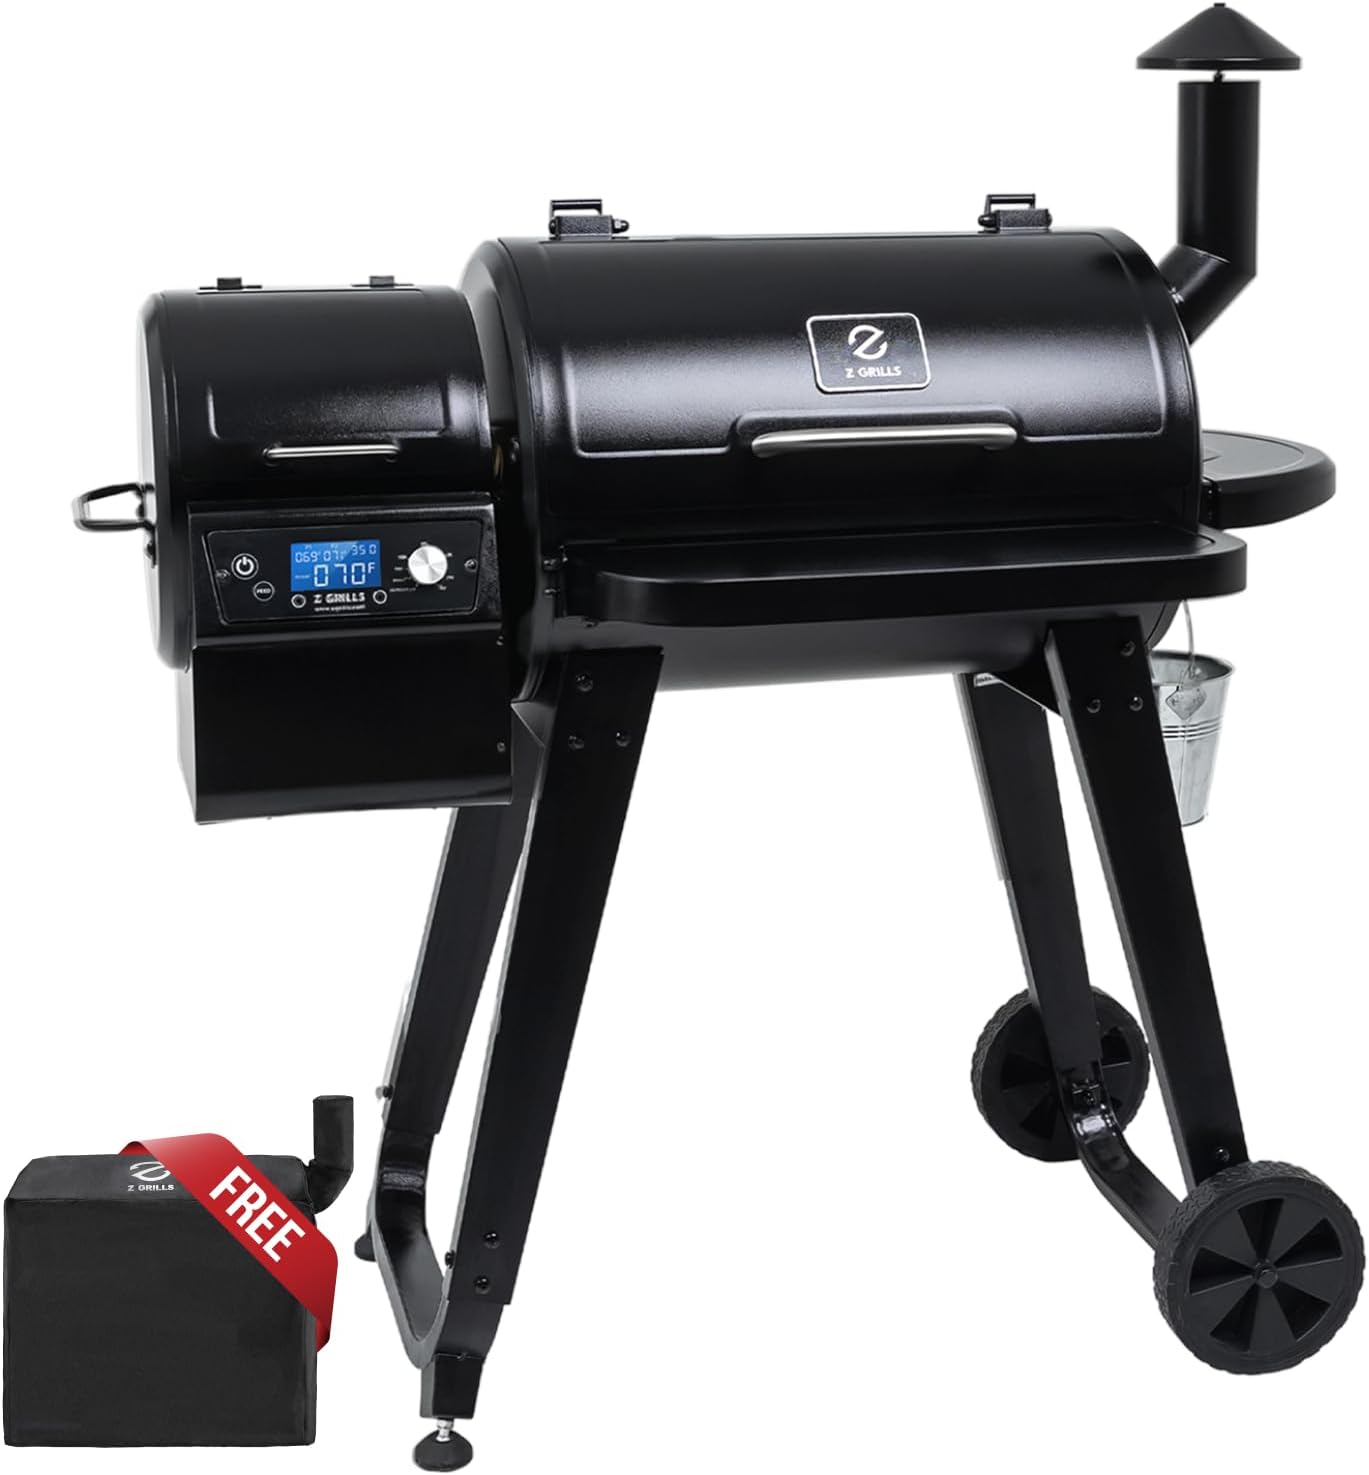
Runner-up: Z GRILLS Wood Pellet Grill & Smoker, PID V3.0 Controller, Meat Probe, Foldable Shelf&Side Shelf, 8 in 1 Outdoor BBQ Grill Auto Temperature Control, 459 Sq in Black, 450A
 Visit on Amazon →
The runner-up is the one for a patio with a tight footprint. The foldable shelf and side shelf are the feature that sells it, because a shelf that folds down means the grill fits against the wall when it is not cooking and gives you landing space for a drip pan and a probe roll when it is. On an overnight cook, that landing space is where your thermometer, your gloves, and your wrap paper live.
The PID V3.0 controller does the same job as the one above, holding the chamber instead of guessing at it, and the meat probe runs out through the lid so you can watch the flat from the couch. At 459 square inches it still takes a full packer with room to spare, and the 450 degree ceiling covers everything from a low smoke to a hot finish.
Flaws but not dealbreakers: The smaller chamber means less margin when you load it up. If you are cooking two butts and a brisket at once, you are better off with the larger grill. For one packer and a side, this is plenty.
Anyone with a small deck, a garage wall, or a spouse who has opinions about patio clutter will appreciate the folding shelves.
The overnight cook workflow, step by step
Now the part you came for.
Step one: Buy pellets you trust, and check them for dust. Open the bag and look. If it pours out with a cloud of sawdust, do not put it in the hopper. That dust is what cakes up in humidity and turns into an auger jam at hour six. I buy my own pellets and I say which ones failed, and the failures almost always trace back to dust.
Step two: Burn off the grill and scrape the grates. On a new cooker, run it hot for a full burn-off to cook off the manufacturing oils before any meat touches it. On a grill you already own, scrape the grates and empty the firepot area of ash. A clogged firepot is a cold firepot.
Step three: Fill the hopper before you start, and top it off right before bed. Never start an overnight cook on a half hopper. Hopper capacity is a camping spec on most grills, and a 10 pound hopper means you are filling it at 2 AM like everyone else. Fill it full, then fill it again after the meat goes on.
Step four: Start with the lid open, then set your temp. Pellet grills need to establish a fire before they can hold one. Let the startup cycle finish, close the lid, and let the chamber settle for a good 15 minutes before you trust the number on the display. Then set it to 225 or 250. I run 225 for a packer and 250 when I am short on time and long on confidence.
Step five: Put a second probe at the grate. This is the step almost everybody skips, and it is the one that separates a cook from a guess. The controller reads the chamber, and the chamber is not the grate. Clip a probe at grate level near the meat and let it ride all night. When the two numbers disagree, you believe the probe.
Step six: Load the meat and place the probe properly. Fat side toward the heat source, point toward the cooler end of the chamber. Slide the meat probe into the thickest part of the flat, not the point, and not near the bone. Route the wire so the lid closes on it without pinching.
Step seven: Build a wind break. A 25 mph Kansas wind will pull heat out of any cooker on the market, and no controller can outrun weather it cannot see. A couple of patio blocks, a folding panel, or the leeward side of the garage makes more difference to your hold time than any upgrade you can buy.
Step eight: Set one alarm, not five. Check the graph, the hopper, and the meat temp, then go back to bed. Every lid opening dumps heat and adds time. The whole point of an overnight cook is that you are not standing next to it.
Step nine: Wrap when the bark sets, not when the clock says. I wrap at 165 when the bark is set, and I do not argue about it. If the bark still looks wet, leave it alone and check again in an hour. The temperature is a signal, not a schedule.
Step ten: Hold it. When the flat probes like soft butter, pull it, wrap it, and rest it in a cooler with a towel over it. Hold time is the spec nobody puts on the box, and a good rest is worth an hour of cook time.
The mistakes that cost you a brisket
Trusting the controller display. The display reads the chamber, and the chamber reads whatever the sensor happens to be sitting in. Your grate probe is the truth.
Chasing temperature with the lid open. Every time you open the lid, you add cook time and lose heat. If the number drifts, adjust the controller and walk away for 15 minutes before you touch anything else.
Starting on a half hopper. You will run out at the worst possible moment, and a flameout at hour six means cold meat and a re-light at dawn.
Cheap pellets in a humid garage. Pellets absorb moisture, moisture makes dust, and dust makes auger jams. Store them sealed and dry.
No wind break. This is the number one reason a grill that holds temp on a calm day swings hard on a windy night.
Watching the app instead of the graph. WiFi is a convenience, not a feature. I judge on the cook, not the phone, and apps that lose connection at 11 PM are why I still clip a standalone probe to the grate.
What the cook actually costs you
The money part is simple. Both grills sit in the same neighborhood on price, so check current Amazon price on each and let capacity make the decision for you: more grate area if you cook for a crowd, folding shelves if you cook on a small patio.
The real cost of an overnight cook is attention, and it is paid in three places. Pellets, which you burn through faster in wind and cold. Time, which is roughly a full day from trim to rest. And sleep, which you get to keep only if the setup was right before you went to bed.
Compare that to the alternative. A grill that swings 30 degrees is a campfire with a hopper, and a campfire does not care that you set an alarm. You will be up at 3 AM anyway, only this time you will be up because something went wrong instead of because you wanted to check the graph.
Do the setup, place the probes, build the wind break, and go to sleep. That is the whole trick, and it is the same trick whether you are running a 565 square inch chamber or a 459 square inch one on a small deck.
Your grill was built to do this. Let it.